
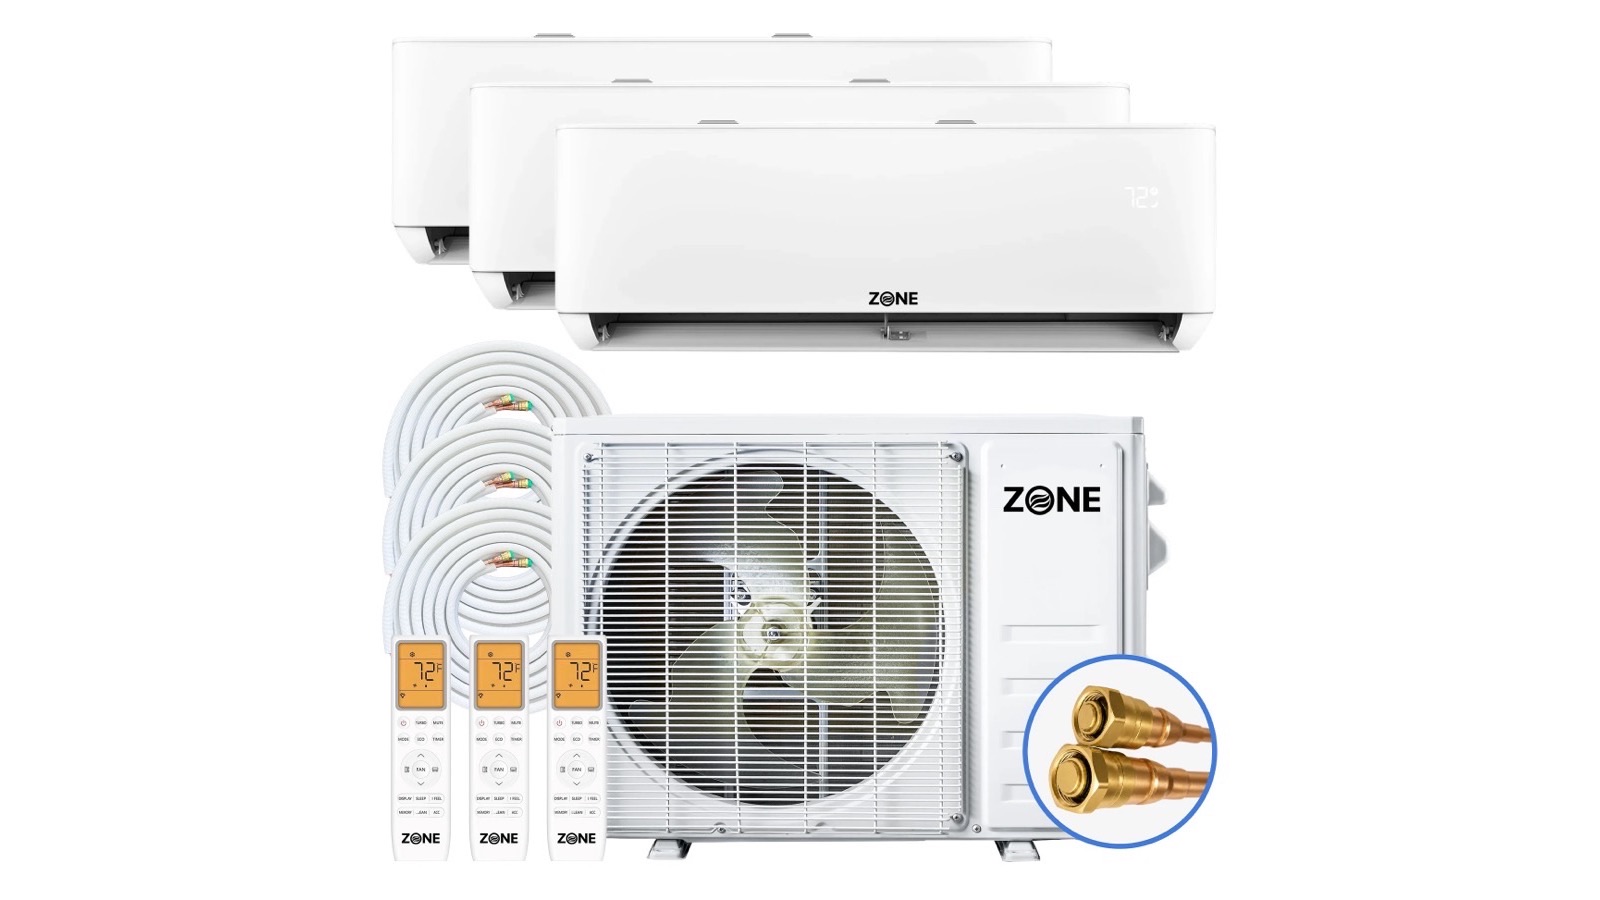
A DIY 3 zone mini split lets you heat and cool three separate rooms from a single outdoor unit, without hiring an HVAC contractor. This guide covers everything from sizing and planning through installation and smart controls, comparing the Zone Air DIY 3 Zone system against MRCOOL's DIY 5th Gen multi-zone kits on specs, flexibility, and total cost.
Quick answer: why a DIY 3 zone mini split and how it stacks up to MRCOOL
A DIY 3 zone mini split system is made up of one outdoor condenser (heat pump) that is connected to three indoor air handlers. Each handler has its own thermostat and remote control, so multi-zone systems can give you independent temperature control for different rooms. Installing multi-zone systems involves multiple indoor units connected to one outdoor condenser, but the "DIY" label means the product arrives with sealed, pre-charged line sets and quick-connect fittings that are designed to make refrigerant line installation easier. Because the refrigerant stays sealed in the factory-charged line set and never opens to atmosphere, there is no vacuum pump, no gauge set and no EPA 608 certification in the install.
When you look at the Zone Air DIY 3 Zone next to MRCOOL's DIY multi-zone kits, it stands out in three areas: efficiency, indoor head flexibility and line set customization.
Efficiency. Zone Air's 3-zone wall-mount systems are rated 24 SEER2, against 23.9 SEER2 for MRCOOL's 18K multi-zone condenser and 23 SEER2 for its 27K. A Zone Air 3-zone wall system with three 9K or three 12K heads lists at $3,809.99 (October 2026), and you can order each zone's pre-charged line set at the length you measure.
Indoor head flexibility. Zone Air is the only DIY mini split that lets you combine wall-mount, ceiling cassette and concealed ducted units on one outdoor unit (as of October 2026). MRCOOL's DIY multi-zone line combines wall-mount heads with its OuttaSight ceiling cassette, but MRCOOL does not sell a concealed-duct DIY unit.
Line set customization. Of the brands compared here, Zone Air is the only one (as of October 2026) that cuts your pre-charged line set to the exact length you measure, any whole foot from 5 to 75, sealed and pre-charged with R-454B. MRCOOL sends fixed 11.5, 16, 25, 35 and 50 ft sets plus couplers for longer runs, and its manual has you coil the excess behind the condenser. Zone Air is able to remove that leftover coil at the order stage.
Here are the top benefits of choosing a DIY 3 zone mini split, specifically the Zone Air system:
- Pre-charged line sets allow you to install the system without specialized HVAC tools, so you don't need to buy a vacuum pump, manifold gauges or anything to handle refrigerant.
- It does both heating and cooling, with rated heating performance down to -13°F and cooling up to 131°F outdoor temp
- Wi-Fi app control is included, and you can use it with Google Assistant and Amazon Alexa.
- You can mix wall-mount heads, cassette heads and concealed ducted heads under one outdoor unit.
- DIY installation can save a lot on professional labor costs, and installing it yourself does not void the warranty
Here's a concrete example. The Zone Air DIY 3 Zone 27,000 BTU system uses three 9,000 BTU wall-mounted heads with their 27K multi-zone outdoor unit. When you run it across three rooms, it'll condition up to 1,350 sq ft. Think two bedrooms and a living room, since each head is rated for up to 450 sq ft. The system runs on 208-230V and has a 30A double-pole breaker. It'll heat down to -13°F. Each zone can get a custom-length line set, cut to the exact distance you need.
This guide is here to walk you through sizing and planning all the way to installation and smart controls. Every section looks at how Zone Air's DIY 3 Zone system compares to MRCOOL's DIY 5th Gen multi-zone kits so you can pick the right product for your home.
Planning your 3 zone DIY system
If you don't plan this out, you can run into two expensive mistakes: buying a system that's too small for your rooms, or finding out your electrical panel can't handle the condenser. Before you order any DIY 3 zone mini split, you should measure every room to see how big it is, check your breaker panel to see what it can handle, and map out where the line sets are going to run.
BTU sizing for three zones
- Usually a small bedroom needs 6,000 to 9,000 BTU
- A living room of about 300 sq ft is going to need about 12,000 BTU
- A home office of 100 to 200 sq ft is going to need 6,000 to 9,000 BTU
- MRCOOL's DIY multi-zone condensers come in 18K (up to 3 zones), 27K (4 zones), 36K (5 zones), 48K and 55K (6 zones). If you've got three 9K to 12K heads, check MRCOOL's combination table to find the condenser that matches
- Every Zone Air 2-zone and 3-zone system uses the same 27,000 BTU outdoor unit. The BTU figure in a Zone Air 3-zone product name (27K, 30K, 33K, 36K) is the connected indoor capacity - so the 36K system has three 12K heads and covers up to 1,800 sq ft
Indoor unit types
- Wall-mounted heads are the standard choice for both Zone Air and MRCOOL
- Ceiling cassettes are the kind that get mounted so they sit flush with the ceiling. With a 22-inch square chassis, Zone Air's ceiling cassette sends air out in four directions. MRCOOL's OuttaSight is a cassette that is 50 inches long and has a single slot that sends air out one way and fits between ceiling joists that are 16 inches apart. A 4-way unit can sit in the middle of a room and cover it pretty evenly, while a one-way slot works best along one wall
- Concealed ducted units are the kind that hide inside a closet or soffit and send air out through short duct runs. With a height of 7⅞ inches, Zone Air's Thin-Air concealed ducted unit is available in its 3-zone systems. MRCOOL does not sell a DIY unit that has concealed ducts. Its DIY Hybrid Air Handler is a ducted unit with a design like a furnace that goes in a central spot. It is not a concealed room unit
Line set length planning
- MRCOOL line set lengths are the kind you can get in 11.5, 16, 25, 35 or 50 feet. These are the sizes you can get, though you can use couplers for longer runs up to 75 ft per indoor unit.
- Zone Air sends out pre-charged line sets that are cut to the length you want, in any whole-foot length from 5 to 75 ft. Its 25, 33, 50 and 75 ft sets are each one continuous run that is factory-sealed with no field joint.
- Maximum vertical lift varies by brand and unit size. Zone Air allows 33 ft up or down for 9K and 12K units, and up to 50 ft for 18K units. MRCOOL's multi-zone manual allows 33 ft between indoor and outdoor units.
- Because the lines come pre-charged with quick-connect fittings, you don't need to get out vacuum pumps and gauges on either system.
- Why does ordering the right length matter? If you get a fixed length, the extra line has to be coiled up behind the condenser.
Electrical requirements
- Which condenser you get determines what you need, but a 3-zone condenser usually needs a dedicated circuit of 208 to 230V with a double-pole breaker of 20 to 35 amp.
- According to MRCOOL's catalog, the 18K multi-zone condenser lists a 20A max fuse, the 27K takes 25A and the 36K takes 35A.
- For Zone Air's 3-zone systems, you need a double-pole circuit of 30A at 208-230V.
- Before you order, check your panel to see if you have open spots and enough total capacity for amperage.
- DIY kits keep the field wiring to a minimum, but you may still need a licensed electrician to run a new 230V circuit out to the location of the outdoor unit.
Climate considerations
- Zone Air's multi-zone systems are rated for heating down to -13°F and cooling in outdoor temperatures from 5°F to 131°F, so they cover a wide range.
- MRCOOL's 18K through 48K DIY multi-zone condensers are rated for heating down to -13°F and cooling from -13°F to 122°F. Only its 55K multi-zone condenser is able to reach -22°F.
- On any heat pump, the capacity drops as the outdoor temperature falls, so the -13°F figure is an operating limit and not the full output.
- If you live in a place where winter temperatures regularly drop below -15°F, it's a good idea to consider supplemental heat regardless of brand
Installation supplies & step-by-step DIY setup (no specialized tools required)
Both Zone Air DIY 3 Zone and MRCOOL's DIY 5th Gen multi-zone systems are designed so a homeowner with basic tool skills can handle the install; MRCOOL says "no special tools or training are necessary to install". The core difference: both use quick-connect line sets, but MRCOOL's fixed lengths sometimes force coiling or coupler use, while Zone Air's custom-cut sets arrive at the length you measured. The installation manual guides the entire process step by step for both brands.
Core installation supplies
At the very least, you'll need to get a stud finder and a drill. Below is the full list, and it comes from Zone Air's install FAQ:
- Cordless drill with masonry/wood bits
- A 3-inch hole saw (or a 3.25-inch hole saw if you want clean clearance), plus two adjustable wrenches that are 10 inches or larger for the quick-connect fittings. An HVAC torque wrench is preferred but it is not required
- Stud finder
- Level (a stud finder and level help you mount the indoor units firmly)
- Screwdriver set (Phillips and flathead)
- Wire stripper and non-contact voltage checker
- Leak detection spray (soapy water works fine)
- Vacuum for wall dust cleanup
- Not required: refrigerant manifold gauges, vacuum pump, recovery tank, flaring tool or any specialized tools for handling refrigerant
Outdoor condenser installation
You'll need to prep the site right so the outdoor unit sits firm. Here's how to do it:
- With a level ground pad or wall bracket, the condenser should be put so that the space from the wall and on the air discharge side matches what your manual lists
- Anchor the unit with bolts to the pad or bracket so it can't move in high winds
- You can connect the pre-charged line sets to the service ports on the condenser by using the quick-connect fittings that come with it
- Airflow clearance on all sides should be kept the way the manual says. If you restrict airflow it'll cut into both cooling and heating output
Indoor air handler installation
All three heads are installed the same way. Each unit has a mounting plate that you attach to the wall with screws.
- Attach the metal mounting plate to the wall so that it hits at least two studs
- Drill the hole through the exterior wall so it slopes downward a bit (about 1/8 to 1/4 inch per foot). This slope matters because each indoor unit makes condensation and it has to drain outside right
- Run the line set through the hole, along with the condensate drain hose and the communication cable
- Each refrigerant line has to keep a proper slope so that the condensate is able to drain out
- Tighten the quick-connect fittings on the refrigerant line to spec; over-torqued fittings count as an installation mistake that the warranty does not cover
- Hang the indoor unit on the mounting plate and make sure it's level
- Repeat for all three zones
Improper refrigerant line connections can lead to leaks and they can lead to performance issues. You'll want to apply leak detection spray to every fitting after you connect them and look for bubbles before you turn the power on.
Electrical connections
Installation usually is going to need electrical work such as a dedicated circuit from your panel to the outdoor unit.
- You'll run the correctly sized power cable from your service panel to the outdoor disconnect box, and you'll use the condenser's MCA and MOCP ratings to figure out the right size
- Install the disconnect box where you can see it from the outdoor unit, per code
- Wire each indoor unit to the condenser using the terminal strips the manufacturer labeled and the communication cable Zone Air sends with every unit
- Electrical components should comply with local building codes for safety; many jurisdictions require a licensed electrician to make the final connection at the panel
Support options
- Out of Kentucky, MRCOOL's support is US-based
- With live technical support 8 AM to 6 PM MT, Zone Air sells direct and provides an install video library, step-by-step install guides and a written DIY manual
Final commissioning
- Open the service valves on the pre-charged line sets
- Spray soap water on all fittings and check for bubbles (leaks)
- At the disconnect and breaker, the system can be turned on
- You'll set the temperature you want to start with on the remote or app for each zone
- Verify that each zone independently heats and cools as expected
Smart Wi-Fi Control, Features and Warranty Comparison
Once you've got your DIY 3 zone mini split up and running, day-to-day comfort comes down to how you go about controlling it. Both Zone Air and MRCOOL give you control through an app, but the hardware works in a different way and that is something that matters for long-term ownership.
Smart Wi-Fi control
MRCOOL's DIY 5th Gen connects to its smartphone app through a Wi-Fi dongle, which is covered as a part under its warranty. Each zone can be adjusted on its own, so you can set up scheduling and remote access for it. Voice control for Amazon Alexa and Google Assistant runs through MRCOOL's MST07 smart thermostat.
Zone Air's DIY 3 Zone system gives every zone its own thermostat and its own Wi-Fi control. Per Zone Air's FAQ, the app handles the temperature for each zone, along with scheduling, geofencing and remote setpoints and it works with Alexa and Google Home voice control. The IR remote's 7-day schedule keeps working even without Wi-Fi. Zone Air does not lock features behind a paid app fee.
Operating features
| Feature | Zone Air DIY 3 Zone | MRCOOL DIY 5th Gen Multi-Zone |
|---|---|---|
| Follow Me (remote temp sensing) | Yes | Yes |
| Sleep, Turbo, ECO and dehumidify modes | Yes | Varies by head; see MRCOOL catalog |
| Wi-Fi app | Yes, per zone | Yes, via Wi-Fi dongle |
| Voice control | Alexa, Google Home | Alexa, Google Assistant (via MST07 thermostat) |
| Highest outdoor cooling temp | 131°F | 122°F |
| Heating floor | -13°F | -13°F (18K–48K); -22°F (55K) |
| Wall-system SEER2 | 24 | 23.9 (18K), 23 (27K) |
| Refrigerant | R-454B | R-454B |
The Zone Air features come from its product listings. For the MRCOOL ranges and ratings, those come from the MRCOOL catalog.
Durability features
- With Gold Fin corrosion resistance on the condenser coils, the MRCOOL system has protection that helps keep the coils from breaking down from salt air, rain and UV exposure.
- On its wall heads, Zone Air lists auto-restart after power loss, a self-diagnostic system and refrigerant leakage detection.
Warranty comparison
| Warranty Term | Zone Air DIY 3 Zone | MRCOOL DIY 5th Gen |
|---|---|---|
| Compressor | 7 years | 7 years |
| Parts | 5 years | 5 years (includes remote, Wi-Fi dongle and pre-charged line sets) |
| Remote/controller | 1 year | Covered under 5-year parts |
| Registration | Not required (recommended to keep proof of purchase on file) | "With no registration required" |
| DIY install | Does not void coverage when installed within spec | Designed for DIY; faulty installation is excluded |
Sources: Zone Air warranty, MRCOOL DIY 5th Gen warranty.
Both brands carry 5-year parts and 7-year compressor coverage with no registration deadline, and MRCOOL's paid Care Program is an optional extended-coverage plan you can buy, not something you need for the standard warranty. If you follow the installation manual, DIY installation by the homeowner does not void coverage on either brand.
With free shipping to the lower 48 and 30-day returns on uninstalled units, Zone Air sells direct with terms that are among the best you get in this category. A reseller may not take a return at all and send you to the brand instead.
Why Zone Air wins for 3-zone
If you are a homeowner planning a multi-zone DIY install in 2026, the advantages of Zone Air stack up:
- Custom-cut pre-charged line sets from 5 to 75 ft get rid of the coil that is left over behind the condenser.
- You can mix wall-mount, 4-way ceiling cassette and concealed ducted heads on one outdoor unit. This is the only DIY mini split that allows all three as of October 2026.
- MRCOOL's 18K and 27K multi-zone condensers are rated at 23.9 and 23, and the wall-mount 3-zone system from Zone Air has a rating of 24 SEER2.
- The cooling is rated to 131°F outdoors, and MRCOOL publishes 122°F.
- If you look at the warranty terms, they match what MRCOOL offers (5 years on parts, 7 years on the compressor, and no registration needed), and installing it yourself does not void them.
- Final assembly, testing, and inspection in the USA, from globally-sourced components.
- Zone Air uses R-454B refrigerant, the same low-GWP refrigerant that MRCOOL's 5th Gen uses, so neither brand has a regulatory advantage over the other.
The tradeoff to know: Zone Air's cassette and concealed ducted heads rate lower than its wall heads (the 3-zone concealed ducted system is 22 SEER2), so an all-wall-mount layout is the most efficient choice.
A Zone Air DIY 3 Zone system lets you save money on labor, choose the exact indoor head types your rooms need, and install with confidence that the warranty holds. Start by measuring your three target rooms, checking your electrical panel for 230V/30A capacity, and ordering the line set lengths that match your actual wall-to-condenser distances. The rest is a weekend project.
Related guides
- Best 3 zone DIY mini split - Zone Air against the flare brands for three rooms
- MRCOOL DIY dual zone mini split with precharged line sets - 5th Gen line set limits and cold ratings
- MRCOOL vs Zone Air - the two quick-connect systems side by side
- Best DIY multi zone mini split
- Best DIY multi zone concealed ducted mini split
Get a quote on a 3 zone mini split
Specs, prices and warranty terms are manufacturer-published as of October 2026, subject to change; verify before purchase. MRCOOL®, DIY 5th Gen, OuttaSight, Quick Connect and Gold Fin are trademarks of their owner; Zone Air is a trademark of its owner; other brand names are trademarks of their owners. HVAC On Sale is not affiliated with or endorsed by MRCOOL.